It’s corn season! MMMMMM! I love fresh corn. Unfortunately, it all comes out at the same time. Who wouldn’t like to have that fresh corn taste all year long? Well, it’s really not that hard. We have been freezing that fresh summer corn for years. It takes a little bit of work, but really not much more than you would have spent preparing the corn for dinner in the first place.
It can also save you a lot of money. We pay to join a CSA (community-supported agriculture) every year and we get baskets full of corn anyway. This year we are getting our corn from Liberty Mills Farm in Orange, VA. Even at the farmer’s market or supermarket, though, it can be ridiculously cheap. We recently saw 2-pound bags of the store brand corn selling for $3 each. To get the same amount of fresh corn will cost you less that $2 and a little bit of your time. The best part, in my opinion, of freezing your own corn versus buying it from the freezer section is that you get to freeze the cobs too! Those simple cobs that we normally throw out can make the most beautiful, comforting stock for soups, chowders, or risottos that can really bring a ray of sunshine to those winter doldrums. Saving money and getting more for the money that you are saving. I like the sound of that!
So, without any further ado, here is our simple process for freezing that yummy summer corn for the winter.
 (1) Husk the corn and remove as much of the silk as possible. (2) Place the corn into salted, boiling water for 2-3 minutes. Fresh corn doesn’t need to be cooked much and it’s going to be reheated out of the freezer anyhow. (3) Pull the corn out of the water into a bowl to transfer it. Admire just how gorgeous the corn is!
 (4) Place the corn into ice water. This will shock it to stop the cooking, keep the beautiful color, and cool it down so that you can handle it. (5) Using a fork in the cob to keep your hands out of the way, place the corn into a deep bowl and slice the outer edge of the kernels with a sharp knife. You are not looking to go all of the way into the cob; you just want the sweet tasty part. If you go too deep, though, it’s ok, it’ll still taste good. If you do not go deep enough, it’ll just make the stock that much better! You want a deep bowl so that the kernels don’t cover your kitchen. If you are doing a lot of corn, you might want a deep bowl for slicing and another bigger bowl to hold it all. (6) Admire all of your hard work and resist the temptation to add butter, salt, and pepper and dig in!
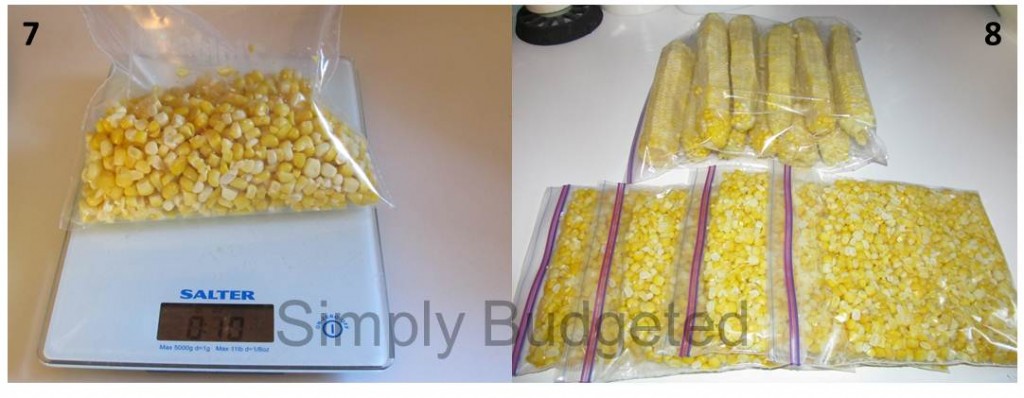
(7) Transfer the corn to zip top freezer bags and weigh into the desired portions. 10 oz is usually enough for me, Beth, and our three little ones. As they get bigger, we are going to have to start adding more. (8) The final result is over 3 pounds of cut corn and 11 corn cobs for the beautifully golden stock.
I hope that you all enjoy our simple little tip. It’s easy, saves money, keeps your family a little healthier. All in all, that’s Simply Budgeted!


What a great idea! I’m really bad about only thinking of the current season and how much I can use in a decent time period. Since the boys love corn I will have to try freezing it myself!!
What a great idea. I normally just buy vegetables as I need them or use them from a can. Sometimes we see really good deals on corn, but never thought to put in the freezer.
I didn’t know you were supposed to use the cold water to stop the cooking process. Great tips!
Thanks for this helpful tip! I will have to put this to use.
good idea love corn